Settings
Using the FilmProCaS application
Step 1.
After installation, the first task is to fill in the movie / production title and Script No. windows. It is important to know that the Script No. numbering will give the order of the pages in pdf, given that the descriptions of the scene settings are not always in order. These are interchangeable while writing,even before creating a PDF. The data entered can be rewritten to a new numbering, so that any completed page can be swapped at the last minute.
By filling in the Format window, the cropping of the Camera Plan window changes visually according to the aspect ratio, thus helping to create the image composition, which can be changed page by page if you want to indicate a difference in the filming.
Step 2.
Use of tables and the data in them
Some windows also contain pre-entered data for easier and faster use. All the data in it can be modified, by typing in the use of your own equipment or new systems rented or newly released in the meantime. Such windows are Format, Camera, Lens, Filter, Film Stock, Frame Rate, T-Stop + Gain, Shutter, Camera move, Film Rating, Kelvin / Mired windows.
Step 3.
Dual function windows and databases
![]()
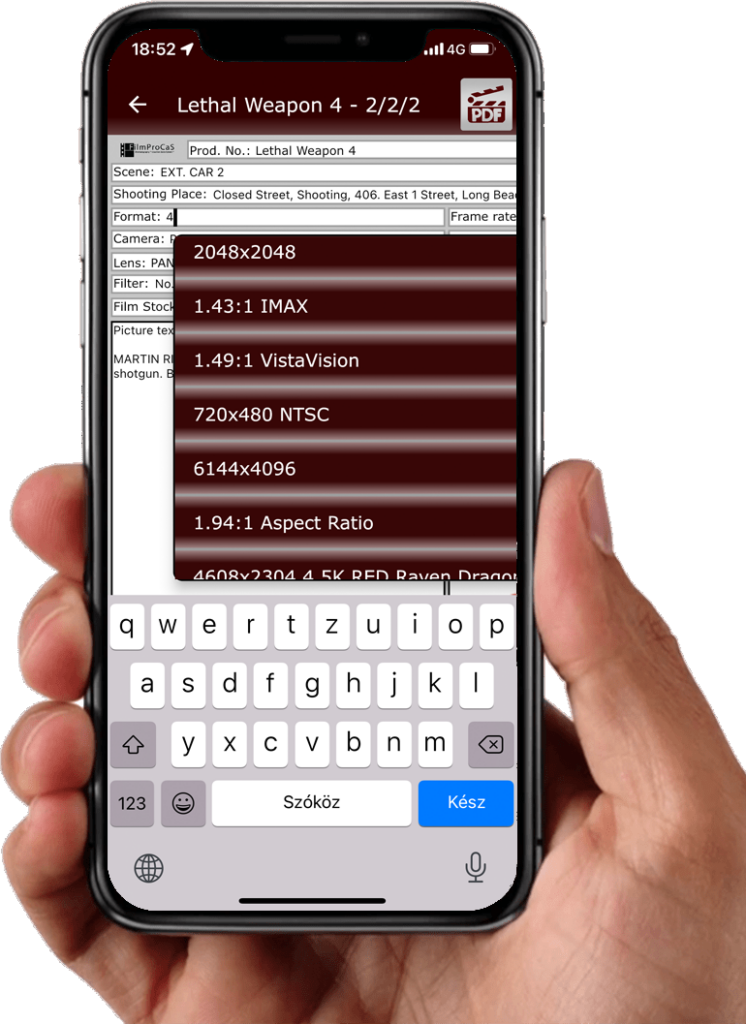
The two function windows are, for example, a Film Stock, which, if it is not filmed on film, it contains the digital recording formats in the database in them. The Format window also contains the movie, such as 1: 2.40, and the recording image size used for digital recordings, such as 1920 × 1080. The two function windows include the Frame window. They are also available with a film format, 24 Frame and the 50P digital display. The Film Rating also has two function windows, since EI / ISO, ASA, DIN, GOSZT, WESTON, SCHEINER and BSI can also be selected. Among the dual-function windows, we should also mention the related data of Kelvin and Mired, as well as the two types of display of the Shutter window. The 180 degree and the 1/48 for 24 Frames and 1/50 for 25 Frames depending on the Frame Rate.
Step 4.
Using the Camera Plan window, image insertions, the camera, and the Paint function
The image size and cropping of the Camera Plan window can be set on the left side of the Format window, for example 2.40: 1 Anamorphic or 2048 × 1080 2K.
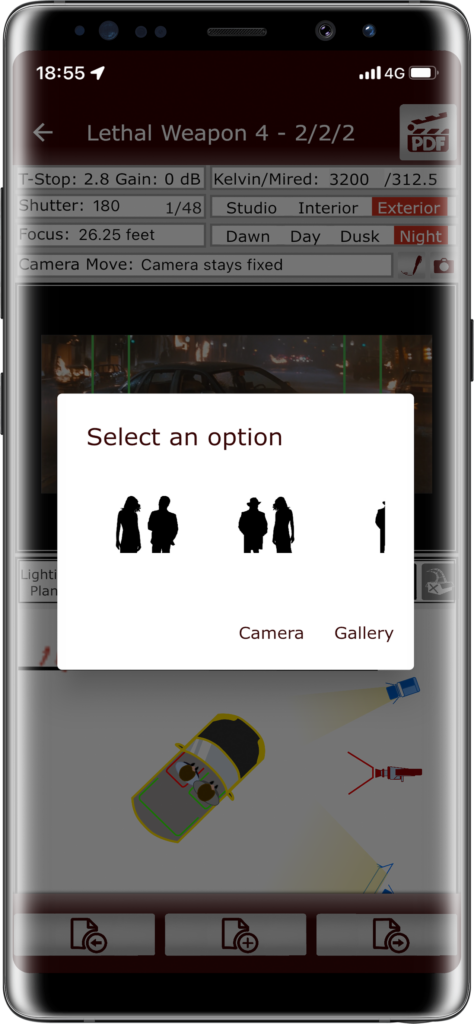
In the Camera Plan window, you can insert one of the silhouette photo samples in the app, or choose from the existing photos on your phone, but you can take a new photo with your phone’s camera, which you can find later in the FilmProCaS library on your phone.
![]()
Once you have selected the right photo, you can adjust it to any composition in the window that the window remembers. If you want to mark anything in the picture, direction of movement, camera movement, you have the option to draw on the picture in six different colors.
Step 5.
Using the Lighting Plan window icon and drawing
Using your two fingers, zoom in on the Lighting Plan window to the center of the screen for a better view. When you use the Lighting Plan window, clicking on the icons above the window will open them up and it allows you to place the selectable icons on the screen such as the shape, camera, lighting, and shape icons. The size and direction of each icon can be changed as desired. If an icon is selected, you can also delete it with the rightmost delete icon.
![]()
You can create custom settings and create lighting plans for multiple camera shots, which speeds up and facilitates the Grip’s work when shooting. If you do not want to work with the icons, you have the option to draw the desired setting, as we have also added a drawing function to the Lighting Plan window. In this left icon row, you will find the pencil icon from the bottom of the second.
![]()
If you have a prefabricated site plan, you can bring it into the Lighting Plan window by taking a photo of it and then by clicking on the bottom icon on the first tab on the left. When planning the shooting, it is important that the production plan shows a list of lighting devices and equipment assigned to the given drawing, which can also be indicated by text entered in letters. This is the top icon in the first left row of icons.
![]()
In the Light Used window we can enter the Grip and our lighting needs for the filming, from which the production manager and the Grip team can also get information.
Step 6.
Using the Picture Text, Sound / Dialog, Cast, and Notes windows
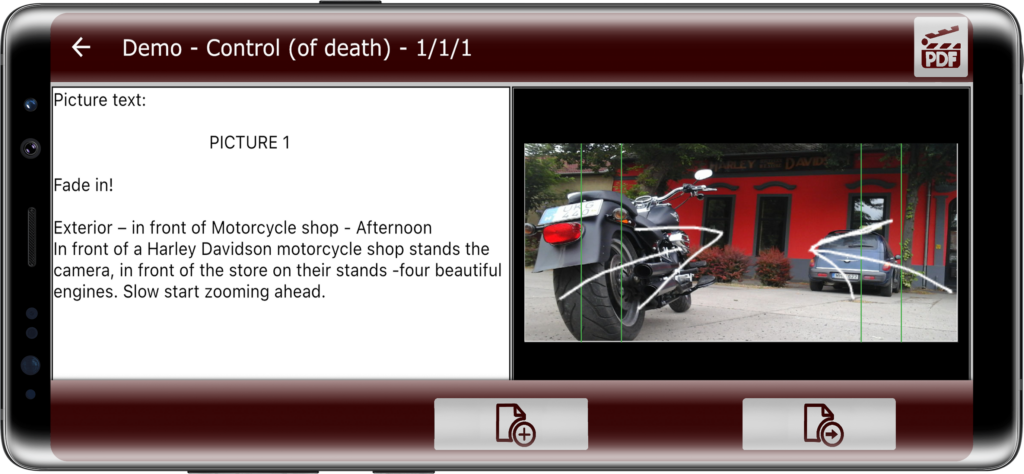
You have the option of entering text in Picture Text and the windows below, as well as entering Copy + Paste of existing written materials. If there is a lot of text to print on the page, the paste function will skip the parts that do not fit in the window. If you do not have a written script and you are planning the film now, it is possible to describe the script corresponding to the page.
![]()
In the same way you can enter the required music or sound-dialog information in the Sound / Dialog window. The Cast are the names of the characters in the scene as well as a brief description. Notes is reserved for other information required for filming.
Step 7.
Other features include Sort, Export, Google Drive, Dropbox and PDF
The production we create will be automatically saved to the device based on the name of the production we provide, as well as to the database in the cloud in case of a wi-fi connection. With the Sort function we have the possibility to create an ascending or descending order by date. The date is important because if you set the capture date on the Script No. page, the exported PDF will insert the pages into the PDF in that order. This allows us to create a shooting sequence as well.
![]()
When exporting, in addition to sharing the PDF, we also have the option to save the .filmprocas files to Google Drive, Dropbox, and share. You can also select these one by one on the Script No. page.
![]()
IMPORTANT to know that you can not only export the finished project, but you also have the option to export and share the Lighting Plan window created within the Script page. Thus, we have the option to assign a magnified PDF page of the Lighting Plan to each Script page when printing, making it easier to set the exact camera settings when shooting.
Step 8.
Plus Page and Next Page features
In the FilmProCaS application, you can find the PLUS PAGE and NEXT PAGE buttons at the bottom of the pages. With the Plus Page function, you can transfer the information of already filled pages to the next page. You do not have to redraw the plan in the Lighting Plan window and you do not have to re-enter the production data. All you have to do is fill in the Pictures Text, Sound / Dialog, Notes and Camera Plan windows to continue the same scene. The Next Page opens a new blank page, so you don’t have to exit the Script page to create another next page.
Step 9.
Delete projects and Script pages
![]()
You can delete certain objects in the FilmProCaS application by pushing the selected project or Script page to the left. Then the application will ask if you are sure you want to delete? If so, press Yes.
Step 10.
IMPORTANT! Use cloud sync when you use the app with other devices! Or if you want to do a backup! For data synchronization the application has to be started. It can be in background too. Do not close the app until the synchronization ended!